Access from Microsoft Office Outlook 2019
summary
How to add a Plesk email account in Microsoft Outlook 2019.
If you have an earlier Outlook version, see instructions for Outlook 2016 or Outlook 2010.
You can set up Microsoft Office Outlook automatically (using the mail autodiscover feature) or manually.
To set up Microsoft Office Outlook 2019 automatically:
Open Microsoft Office Outlook 2019. If you have no account in Microsoft Outlook 2019, go to step 3. If you already have set up an account and want to add another one, go to the next step.
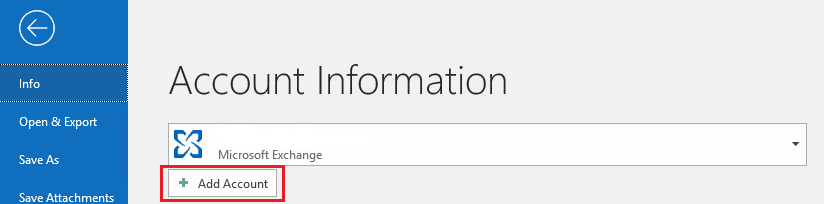
Go to File > Add Account.
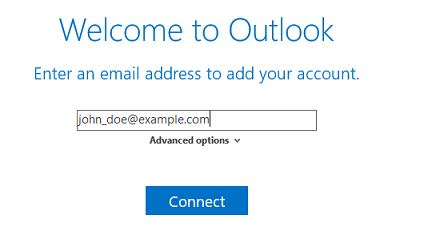
Specify your email address.
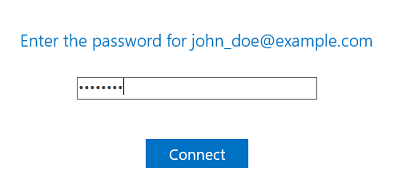
Specify the email address password and click Connect.
You can see the following message if the domain name in the SSL/TLS certificate that secures the Plesk mail server differs from the domain name in the Microsoft Outlook connection settings.
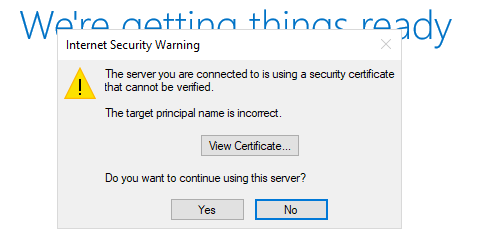
We recommend that you fix this issue before proceeding with Microsoft Outlook setup:
- Secure your domain with a free SSL/TLS certificate from Let’s Encrypt or from another certificate authority.
- Check to what domain name the SSL/TLS certificate is assigned by clicking View Certificate. If the domain name is correct and belongs to your Plesk mail server, try to set up Microsoft Outlook manually. On the screen with your email account settings, change the incoming and outgoing mail servers so that they match the mail server in the SSL/TLS certificate.
If no message appears, proceed to the next step.
Wait a while until Microsoft Office Outlook finishes the setup and click OK when the setup is complete.
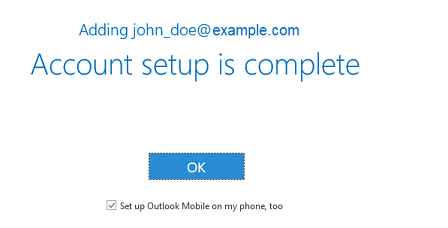
Your account is set up. Microsoft Office Outlook will now send you a test email.
To set up Microsoft Office Outlook 2019 manually:
Open Microsoft Office Outlook 2019. If you have no account in Microsoft Outlook 2019, go to step 3. If you already have set up an account and want to add another one, go to the next step.
Go to File > Add Account.
Specify your email address.
Click the
 icon next to “Advanced options”,
select the “Let me set up my account manually” checkbox, and then click Connect.
icon next to “Advanced options”,
select the “Let me set up my account manually” checkbox, and then click Connect.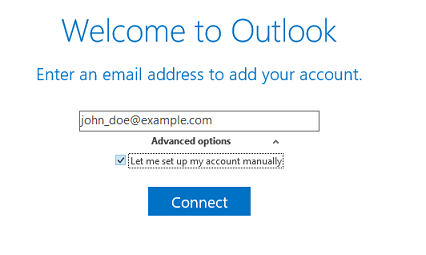
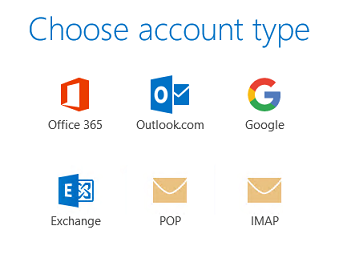
Choose your account type:
- If you want to keep copies of messages on the server, click IMAP. With IMAP, you will also be able to train the SpamAssassin spam filter on email messages you receive if SpamAssassin is enabled on the server.
- If you do not want to keep any messages on the server, click POP.
Microsoft Office Outlook automatically detects the email address settings. Change the setting (if necessary) and click Next.
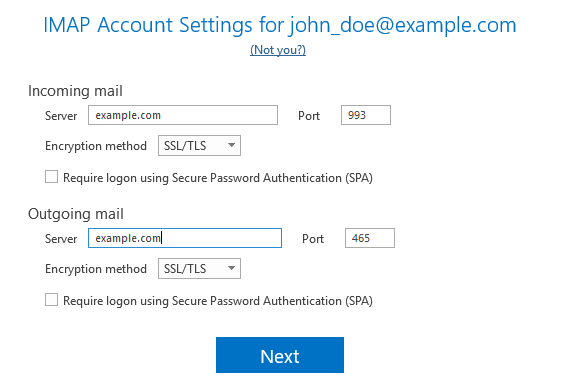
Specify the email address password and click Connect.
You can see the following message if the domain name in the SSL/TLS certificate that secures the Plesk mail server differs from the domain name in the Microsoft Outlook connection settings.
We recommend that you fix this issue before proceeding with Microsoft Outlook setup:
- Secure your domain with a free SSL/TLS certificate from Let’s Encrypt or from another certificate authority.
- Check to what domain name the SSL/TLS certificate is assigned by clicking View Certificate. If the domain name is correct and belongs to your Plesk mail server, return to the previous step. Change the incoming and outgoing mail servers so that they match the mail server in the SSL/TLS certificate.
Wait a while until Microsoft Office Outlook finishes the setup and click OK when the setup is complete.
Your account is set up. Microsoft Office Outlook will now send you a test email.